
Introduction
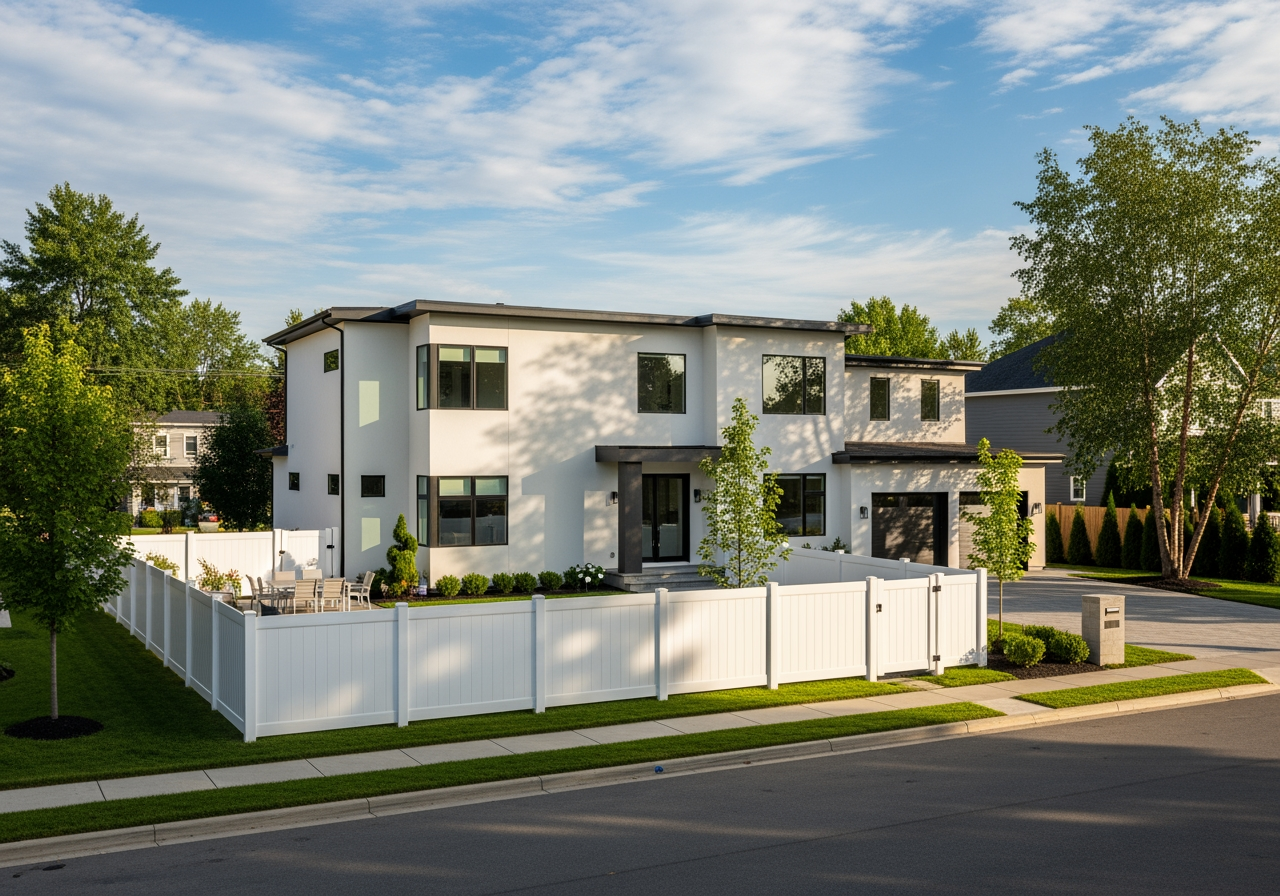
A fence is often the first thing people notice about your home. It’s more than just a boundary marker. A well-chosen fence can greatly boost your property’s curb appeal. It adds value, improves security, and provides much-needed privacy for your family. But with so many choices, how do you pick the perfect fence? And how do you make sure it’s installed to last?
This guide will answer all those questions. We will walk you through everything you need to know. We cover selecting the best materials for your needs. We also detail the crucial steps for a successful installation. Our goal is to help you create a beautiful, functional, and durable fence. One that you can enjoy for years to come.
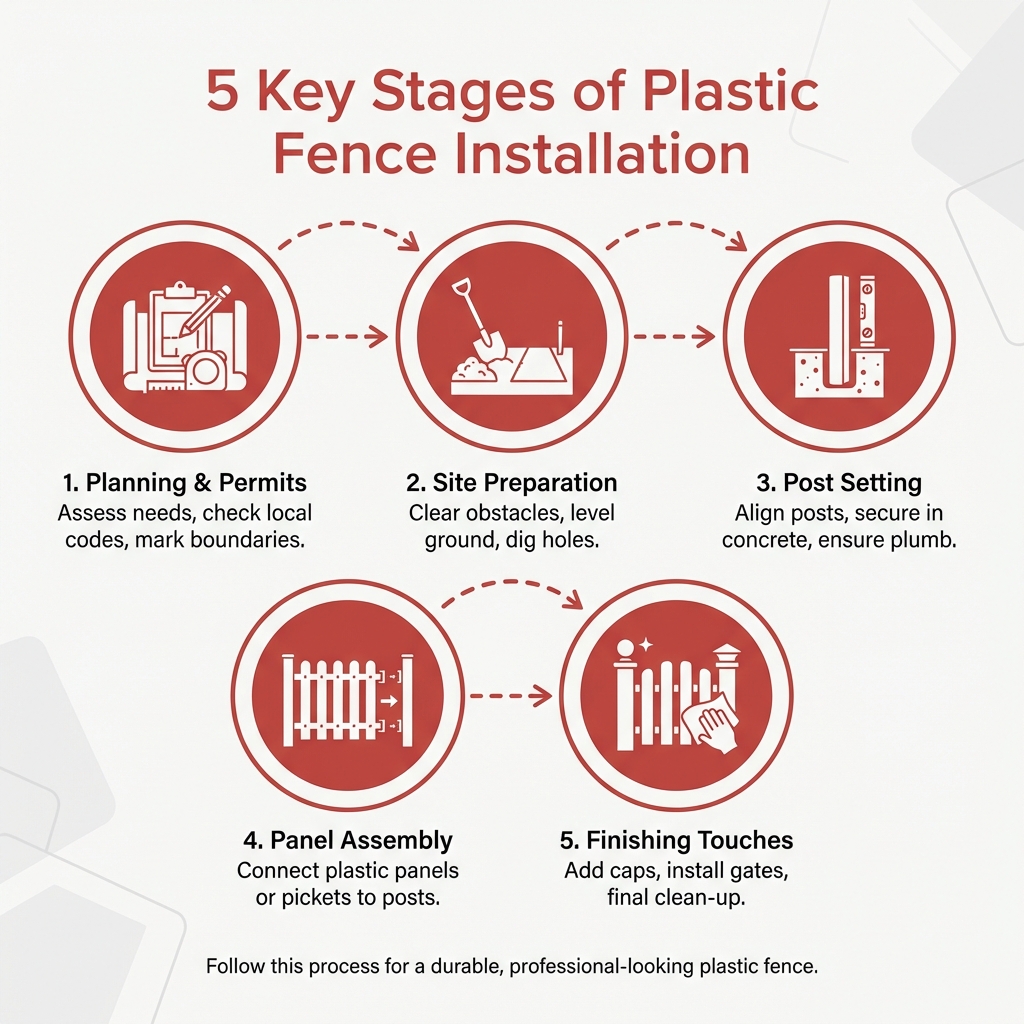
To simplify the journey, we’ve broken down the process into five key stages:
- Planning
- Preparation
- Post Installation
- Panel Assembly
- Finishing Touches
Follow along as we explore each step. We will help you transform your outdoor space with confidence.
Planning Your Fence Project: From Materials to Permits
Before any digging begins, careful planning is paramount. This initial phase involves making crucial decisions about material selection, understanding associated costs, assessing durability and maintenance levels, and determining whether a DIY approach or professional installation is right for you. Equally important is navigating local regulations and confirming property lines to avoid future complications.
Choosing Your Fencing Material
The market presents a wide variety of fencing materials, each with its own characteristics. Your selection will greatly influence the fence’s appearance, durability, and maintenance needs.
Wood fences provide a classic, traditional look that many homeowners love. They are highly customizable in style, height, and finish. However, wood is vulnerable to rot, insects, and warping, requiring regular maintenance, such as staining or sealing.
Vinyl fences, also known as plastic fences, have transformed the fencing market. Made mainly from PVC (polyvinyl chloride), these fences are known for their durability and near-zero maintenance. Unlike wood, vinyl doesn’t rot, fade, or attract pests. It offers excellent weather resistance, making it suitable for a wide range of climates. Although the upfront cost may be higher than wood, vinyl’s long lifespan and minimal yearly maintenance often make it a more cost-effective option over time. A detailed Washington plastic fence guide provides more information on the benefits and available styles.
Metal fences, such as wrought iron, aluminum, and chain-link, offer outstanding security and durability. They can provide a sophisticated, ornamental look or serve as a practical, secure boundary. Aluminum, in particular, is favored for its rust resistance and low maintenance. Metal fences tend to last long, but can be more costly initially and may need occasional rust treatment depending on the material.
Focusing on plastic fence installation, this guide will delve deeper into vinyl and PVC fencing, both of which are highly durable, require minimal upkeep, offer excellent weather resistance, and have longer lifespans than traditional wood.
Your Pre-Installation Fencing Guide Checklist
Thorough preparation is key to a smooth and successful plastic fence installation. Skipping these steps can lead to costly delays, legal issues, or a fence that doesn’t meet your expectations.

- Check Local Building Codes and HOA Rules: Before purchasing any materials or breaking ground, contact your local municipality’s planning or building department. They can provide information on fence height restrictions, setback requirements (the distance the fence must be from property lines), material limitations, and any required permits. If you live in a homeowner’s association (HOA), consult their guidelines, as they often have specific rules regarding fence style, color, and placement. Failure to comply can result in fines or the forced removal of your fence.
- Procure Permits: If your local codes require a permit for fence installation, ensure you obtain it before starting any work. This process typically involves submitting your fence plans for approval.
- Property Survey and Lines: Accurately determine your property lines. This is crucial to ensure your fence is entirely on your land and to avoid disputes with neighbors. A professional property survey may be necessary. Once confirmed, mark your property lines with stakes.
- Call 811 (Utility Locating Service): This is a non-negotiable step. Always call 811 a few days before you plan to dig. This free service will dispatch local utility companies to mark the location of underground pipelines, power lines, and cables on your property. Digging without knowing these locations can be extremely dangerous, leading to severe utility damage or personal injury.
- Communicate with Neighbors: Even if your fence is entirely on your property, it’s a good practice to discuss your plans with your neighbors. This can foster good relations and address any concerns they might have, especially if the fence borders a shared property line.
- Site Preparation: Clear the fence line of any obstacles, such as rocks, debris, vegetation, or old fencing. Ensure the area is as level as possible, or plan for how you will address slopes.
- Gather Essential Tools and Materials: Having everything on hand before you start will prevent interruptions.
Here’s a list of essential tools and materials for a typical plastic fence installation:
- Tools: Post hole digger (manual or powered auger)
- Shovel
- Tape measure
- String line and stakes (for layout)
- Level (post level recommended)
- Rubber mallet or soft-blow hammer (for vinyl components)
- Drill with appropriate bits
- Miter saw or circular saw (with fine-tooth blade for clean plastic cuts)
- Wheelbarrow (for mixing concrete)
- Trowel (for sloping concrete)
- Safety glasses and work gloves
- Utility knife
- Optional: Concrete mixer, vinyl notcher (for rails)
- Materials: Plastic fence posts (line, corner, end, gate posts)
- Plastic fence panels or individual rails and pickets
- Concrete mix (fast-setting recommended)
- Gravel (for post hole drainage)
- Post caps
- Gate hardware (hinges, latch, drop rod if applicable)
- PVC glue (for caps)
- Screws (stainless steel or coated to prevent corrosion)
- Optional: Rebar (for gate or terminal posts), U-channels (for privacy fences)
The Ultimate Fencing Guide to Installation
With your planning complete and materials gathered, we can now move on to the physical installation. This phase involves setting the sturdy foundation of your fence, assembling the panels, and integrating functional gates. Precision and patience are vital here to ensure a durable and aesthetically pleasing result.
Setting the Foundation: Installing Fence Posts
The posts are the backbone of your fence, providing structural integrity. Proper post installation is critical for a long-lasting fence.
Marking Post Locations: Using your string line and stakes, accurately mark the center of each post hole. For plastic fences, panels typically come in 6-foot or 8-foot sections, so measure your post-to-post distance accordingly. Ensure your measurements are from the center of one post to the center of the next.
Digging Post Holes: This step is crucial.
- Depth: A general rule of thumb is to put one-third of the post’s total length in the ground. For most plastic fence installations, post holes should be approximately 2.5 to 3 feet deep. However, local building codes may require deeper holes, especially below the frost line in colder climates. Digging 6 inches deeper than the required concrete depth allows for gravel drainage. Gate posts and main terminal posts (corners, ends) should be set at least 6 inches deeper than line posts for added strength.
- Width: Holes should be at least twice the width of your post. For example, a 4×4 post might require a 10-inch-diameter hole, and a 5×5 post might require a 12-inch-diameter hole. Some guides recommend a bell shape (wider at the bottom) to resist frost heave.
Gravel for Drainage: Place a 6-inch layer of gravel at the bottom of each post hole. This provides essential drainage, preventing water from collecting around the base of the post, which can be detrimental even to plastic posts by compromising the concrete footing over time.
- Mixing and Pouring Concrete: Follow the manufacturer’s instructions for mixing your concrete. Use a fast-setting concrete designed for fence posts.
- Place the post into the hole, ensuring it rests on the gravel.
- Pour the concrete mix around the post, filling the hole. For terminal and gate posts, consider adding rebar for extra reinforcement before pouring concrete.
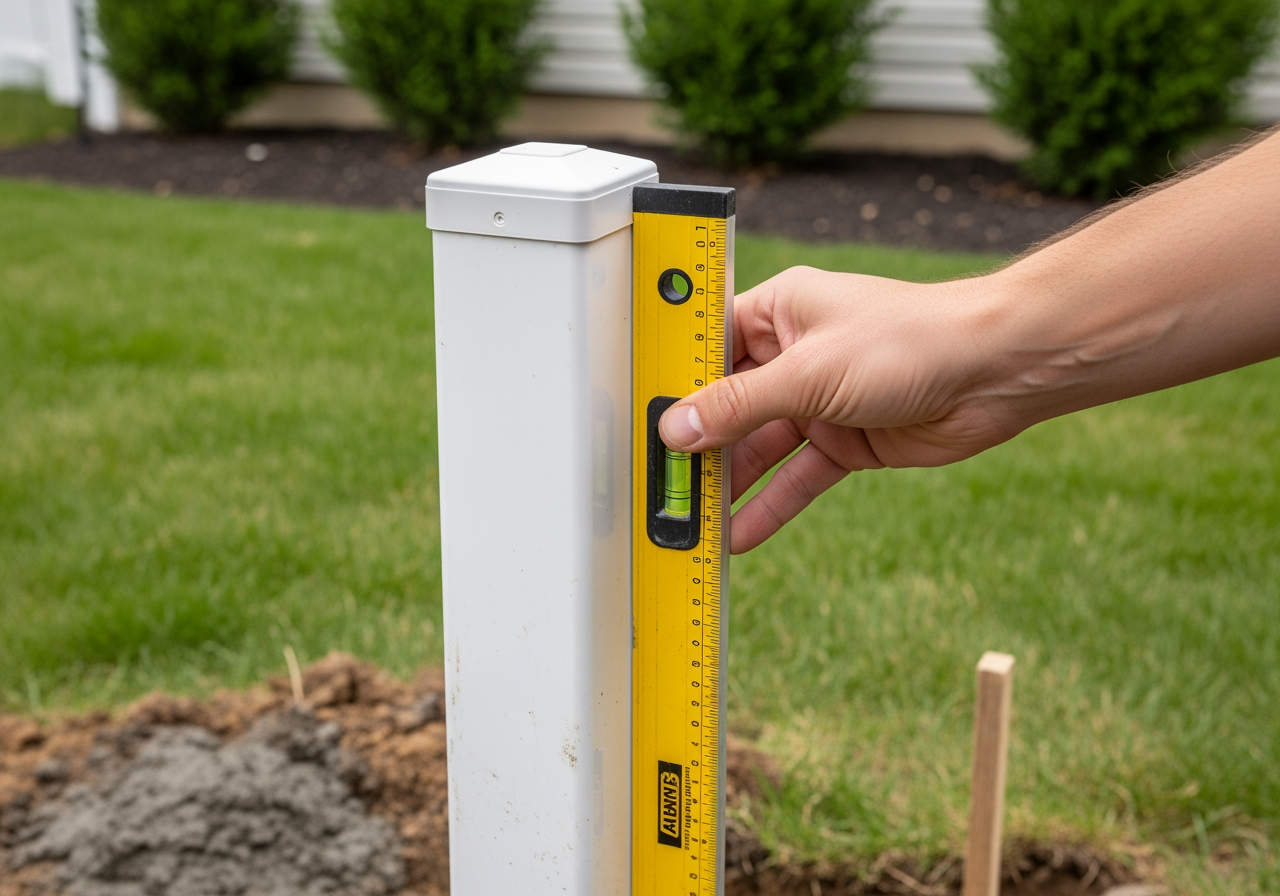
- Setting Posts Plumb and Level: As you pour the concrete, use a post level to ensure the post is perfectly plumb (vertical) on at least two adjacent sides. Use your string line to ensure all posts are aligned. Make adjustments quickly before the concrete sets.
- Sloping Concrete: Slope the top of the concrete away from the post to prevent water from pooling around the post’s base.
Curing Time: Allow the concrete to cure for the recommended time, typically 24 to 48 hours for line posts and up to 72 hours for gate posts, before attaching any fence sections or hanging gates. This ensures maximum strength and stability.
A Step-by-Step Fencing Guide for Panels and Rails
Once your posts are securely set and cured, the next step is to assemble and attach the plastic fence panels and rails. This is where your fence truly takes shape.
Bottom Rail Installation: Start by attaching the bottom rail. Measure the distance between your posts. Many plastic fence systems use pre-routed posts, with rails sliding directly into slots. For other systems, you might use brackets. Ensure the bottom rail is level between posts. Some systems require adding 3 inches to the distance between posts to allow for 1.5 inches of insertion into each post.
- Picket/Panel Insertion: For privacy fences, individual pickets often slide down into the bottom rail and into a U-channel attached to the posts. Insert the first picket, then interlock the remaining pickets. If your post spacing is slightly less than a full panel, you may need to cut one picket or panel section to fit, ensuring the cut edge is against the post.
- For picket fences, individual pickets typically fit into pre-routed holes in the rails.
- Use a soft-blow hammer to gently tap components into place, avoiding direct impact on the vinyl to prevent cracks.
Top Rail Installation: Once all pickets or panels are in place, install the top rail. This usually slides over the pickets and into the post slots or attaches via brackets, similar to the bottom rail. Ensure it’s level and secure.
Securing Components: Depending on your specific plastic fence system, you may need to secure rails to posts with screws. Some systems allow for “notching” the rail ends for a more secure fit. If using screws, ensure they are appropriate for outdoor use and pre-drill pilot holes to prevent splitting the vinyl. For privacy fences, U-channels may be used between the top and bottom holes in posts to add strength and manage expansion/contraction, especially for darker colors.
Post Caps: Once the fence sections are complete, apply post caps. Use PVC glue to secure them, adding a small amount to the inside of the cap’s lip. This provides a finished look and protects the post’s interior from weather elements.
Finishing with Function: Gate Installation Best Practices
Installing a gate within your plastic fence system requires careful attention to detail to ensure it functions smoothly and securely for years to come.
- Gate Post Reinforcement: As mentioned, gate posts bear more stress than line posts. Ensure they are set deeper (at least 6 inches deeper than line posts) and reinforced with concrete and rebar. Allow the concrete to cure for the full 72 hours before hanging the gate.
- Accurate Spacing: The opening for your gate between the two gate posts must be precisely measured. Typically, you’ll need an opening that is 1.25 to 1.5 inches wider than the gate itself to allow for hardware clearance (hinges and latch). For example, a 42-inch wide privacy gate might require posts set 44 inches apart.
- Gate Assembly: Assemble the gate according to the manufacturer’s instructions. Many plastic gates come as kits.
- Hinge Placement: Attach hinges to the gate frame first, pre-drilling holes to prevent splitting. Then, position the gate in the opening, using temporary blocks to hold it at the correct height (ensuring proper ground clearance). Attach the hinges to the gate post, ensuring the gate swings freely and is level.
- Latch Installation: Install the latch hardware on the gate and the corresponding catch on the latch post. Test the gate repeatedly to ensure it opens, closes, and latches securely without binding. Adjust as necessary.
- Final Checks: Ensure all hardware is tightly secured, and the gate operates smoothly. Consider adding a drop rod for double gates for added security.
Tackling Challenges and Ensuring Longevity
Even with the best planning, fence installation can present challenges, especially with uneven terrain. Moreover, ensuring your plastic fence stands the test of time requires understanding proper maintenance and avoiding common pitfalls.
Installing a Fence on Uneven Terrain
Installing a plastic fence on a slope or uneven ground requires specific techniques to maintain both aesthetics and structural integrity.
The Step Method: This is the most common approach for plastic fences. Each fence panel is installed level, creating a “stepped” appearance as the ground slopes down.
- Measure and set posts so that the top rail of each section remains level.
- The bottom of the fence will have a gap where the ground slopes away. This gap can be filled with landscaping or left open, depending on your preference and local regulations.
- Horizontal measurements for post placement are crucial; do not measure parallel to the ground.
The Racking Method: Some plastic fence systems are designed to “rack,” meaning the panels can be adjusted to more closely follow the ground’s slope. This creates a smoother appearance without steps.
- This method is less common for privacy-style plastic fences, but can be found in some picket or semi-private designs.
- Consult your fence manufacturer’s guidelines to determine whether your chosen system is rackable and to obtain specific installation instructions.
Custom Cuts: For very steep or irregular terrain, custom cuts to panels or pickets may be necessary. This requires careful measurement and precise cutting with a fine-tooth blade to maintain a clean finish.
Long-Term Care for Your Investment
One of the primary benefits of choosing a plastic fence is its minimal maintenance requirements. However, a little care goes a long way in ensuring its longevity and appearance.
- Cleaning: Unlike wood, plastic fences do not need painting or staining. Their non-porous surface makes them easy to clean.
- Routine Cleaning: A simple hose down with water is often enough to remove dust and light dirt.
- Deeper Cleaning: For stubborn dirt, mildew, or algae, use a solution of mild soap and water (e.g., dish soap) with a soft brush or sponge. Rinse thoroughly.
- Power Washing: A low-pressure power washer can be used, but exercise caution. Keep the nozzle at a safe distance to avoid damaging the vinyl.
- Inspections: Conduct seasonal inspections (e.g., spring and fall) to check for any loose components, damaged sections, or issues with gate hardware.
- Repairs: While durable, plastic fences can be damaged by extreme impact.
- Minor Scratches/Scuffs: Often, these can be buffed out with a non-abrasive cleaner.
- Cracks/Holes: Small cracks can sometimes be repaired with a vinyl repair kit, expandable foam spray, or plastic filler. For larger damage, individual components (pickets, rails, or even full panels) can often be replaced.
- Hardware Checks: Regularly inspect gate hinges and latches. Tighten any loose screws and lubricate moving parts as needed to ensure smooth operation.
- Avoid Painting: It’s generally not recommended to paint a vinyl fence. The material is designed to be colorfast, but paint can weaken the vinyl, causing it to chip or peel, negating the low-maintenance benefit.
Here’s a list of seasonal maintenance tasks for your plastic fence:
- Spring: Thorough cleaning after winter, check for frost heave around posts, and inspect gate hardware.
- Summer: Spot-clean as needed, check for sun-related bowing (which can often be reversed by turning the component over and exposing the bowed side to the sun), and ensure proper gate function.
- Fall: Clear leaves and debris from the fence line, perform a final cleaning before winter, and inspect for any damage that needs repair before cold weather sets in.
- Winter: Minimal maintenance, but ensure snow and ice don’t put excessive pressure on panels or gates.
Frequently Asked Questions about Fence Installation
We understand that installing a fence can bring up many questions. Here are answers to some of the most common inquiries we receive:
How deep should fence post holes be?
The ideal depth for fence post holes depends on several factors, including the height of your fence, local frost line, and soil conditions. A common guideline is to dig the hole to one-third of the post’s total length. For most plastic fences, this typically translates to a depth of 2.5 to 3 feet. However, we always recommend checking your local building codes, as they often specify minimum depths, especially in regions with significant frost heave. Gate posts and other terminal posts (corner and end posts) should be dug at least 6 inches deeper than line posts to provide extra stability, given the added stress they endure. Remember to include a 6-inch layer of gravel at the bottom for drainage.
How far apart should I place my fence posts?
The spacing of your fence posts is primarily determined by the length of your fence panels. Most plastic fence systems are manufactured with panels that are 6 or 8 feet wide (measured from the center of one post to the center of the next). You will need a post hole every 6 or 8 feet along your fence line, depending on your chosen panel size. It’s crucial to measure accurately and consistently. If your total fence run isn’t an exact multiple of your panel length, you’ll need to either cut one panel section down to fit or adjust the spacing of all line posts slightly to accommodate evenly cut panels. Always refer to your specific fence product’s installation manual for precise post-to-post measurements.
When should I consider hiring a professional for plastic fence installation versus a DIY approach?
While plastic fence installation is a popular DIY project due to its straightforward nature, there are several scenarios where hiring a professional is advisable:
- Complex Terrain: If your property has significant slopes, uneven ground, or challenging soil conditions (e.g., rocky, clay), a professional installer has the experience and specialized equipment to handle these complexities efficiently and correctly.
- Large Projects: For extensive fence lines, a professional team can complete the project much faster and often with greater precision, saving you time and potential frustration.
- Permit Requirements: If your local regulations require complex permits or inspections, a professional installer familiar with these processes can guide them through them seamlessly.
- Time Constraints: If you lack the time or physical ability to dedicate to a multi-day installation project, hiring experts ensures the job gets done without compromising your schedule or health.
- Warranty Concerns: Many manufacturers’ warranties require professional installation to remain valid. A professional installer will also typically offer their own labor warranty.
- Lack of Confidence or Experience: If you’re unsure about any aspect of the installation process, or if you simply want the peace of mind that comes with expert craftsmanship, a professional will deliver a high-quality, long-lasting fence.
While DIY can save on labor costs, a professional installation ensures proper technique, code compliance, and a durable result, often preventing costly mistakes down the line.
Conclusion
Starting on a plastic fence installation project is a significant undertaking that, when done correctly, yields immense rewards. From boosting curb appeal and enhancing privacy to increasing your property’s value, a well-chosen and expertly installed fence transforms your outdoor living space. We’ve walked through the critical stages, from meticulous planning and site preparation to the precise installation of posts, panels, and gates, and finally, the simple yet effective practices for long-term maintenance.
The key to success lies in careful planning, understanding local regulations, and executing each step with precision. Whether you choose the satisfaction of a DIY installation or the assurance of professional expertise, the result should be a beautiful, functional, and durable boundary that you and your family will enjoy for decades to come. With this comprehensive guide, you are now equipped to select and install the perfect plastic fence, turning your vision into a lasting reality.